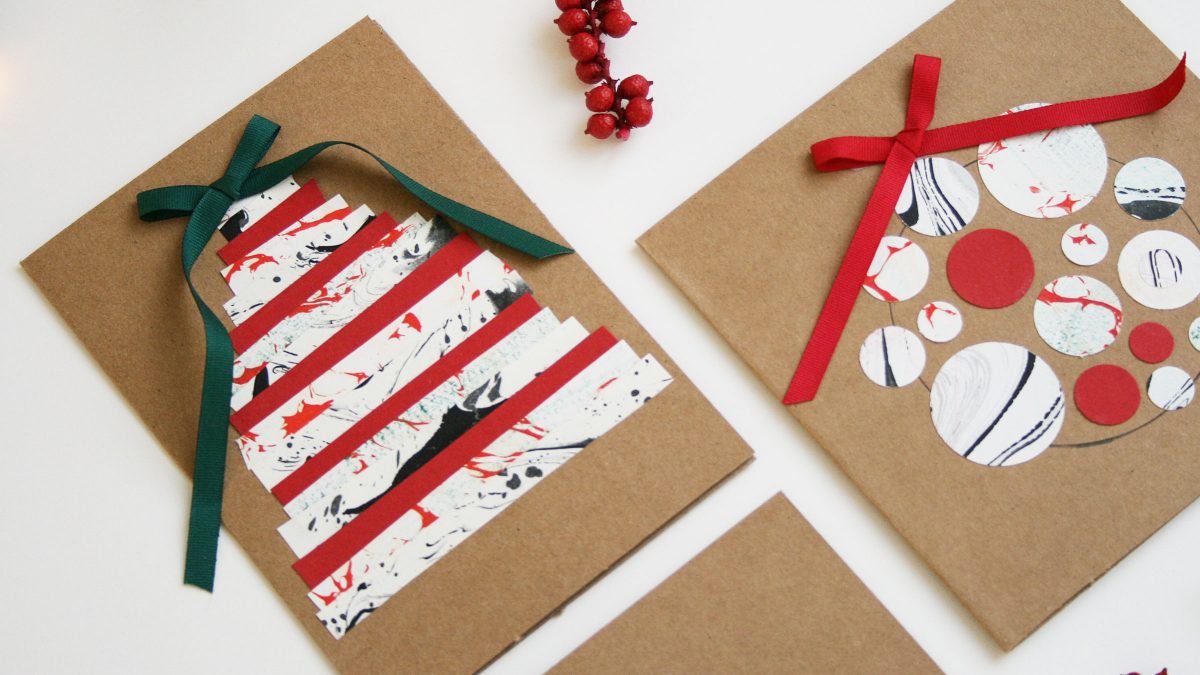
DIY Marmorierte Weihnachtskarten
02/12/2020
3 Reasons To Become A Patron
22/12/2020For the German version of this DIY project click this link.
Ioana from @miss_red_fox contacted me a couple of months ago and asked me whether I would like to participate in this year’s #12giftswithlovegoesxmas Advent calendar. My answer was a clear YEAH! I follow Ioana for a while now and I’m totally in love with her blog and her wonderful DIY projects. We share a passion for all things blue and Japanese arts & crafts. Therefore it was an honour to be part of this creative advent calendar and along the way, write my first German DIY tutorial for the Indigo Blog.
So, what’s this #12giftswithlovegoesxmas thing? 24 creative makers inspire you with awesome DIY ideas, from packaging to delicious recipes and more! For instance, yesterday Sabine-Seyffert showed us how to make a “Christmas bag to-go”. And tomorrow Fee from Fairy Likes will share some ideas for Christmas packaging. But today it’s all about Christmas cards!
This year I didn’t make any Christmas cards to sell in the Indigo Shop, but don’t you worry, because today I have a step-by-step tutorial where I show you how to create a set of unique hand-marbled Christmas cards at home. Ready? Let’s go!
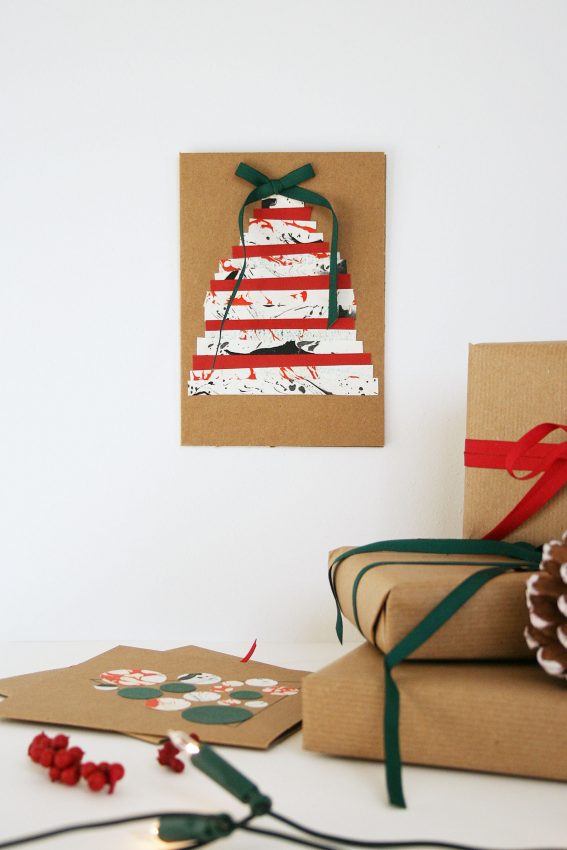
COLLECT INSPIRATION AND MAKE A MOODBOARD
I usually get inspired by the materials I have at home or in the craft room. Like this set of kraft cards I actually bought last year and haven’t used them so far. For small craft projects like this one, I use paper leftovers from my bookbinding projects. But since I didn’t have any “Christmas-like” paper in stock, I marbled a few sheets of paper. I wanted something minimalist and so I went for a Suminagashi-inspired pattern in classic Christmas colours: red, green and black with a few golden brushes.
I want to show you how you can marble a piece of paper like this step-by-step. Of course, you can use any other paper you might have at home, if you prefer.
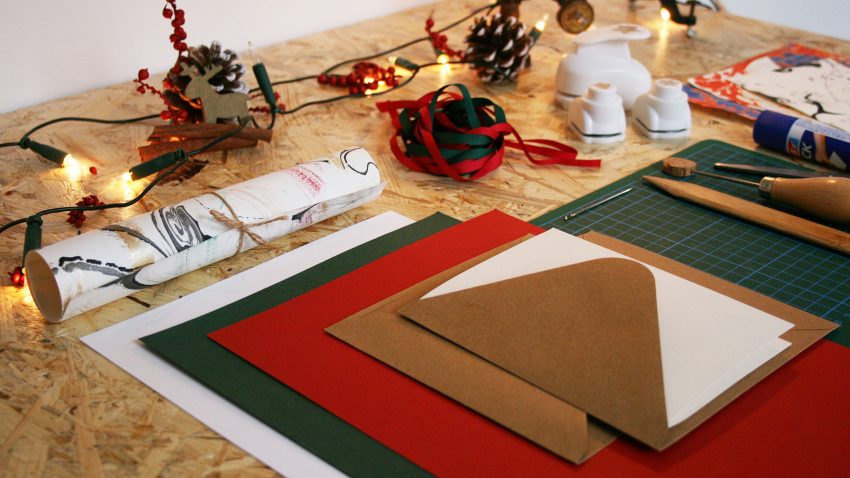
MATERIALS & TOOLS
- For marbling paper you will need:
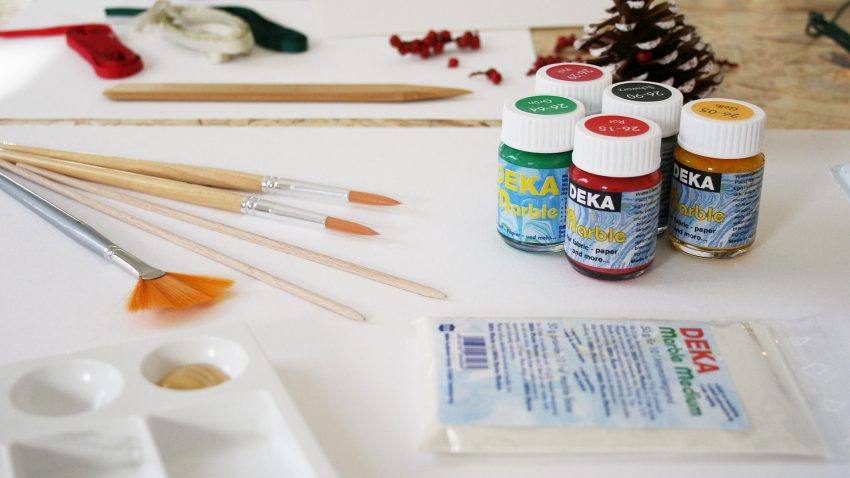
- Deka Marble Paints (e.g. in red, green and black)
- Deka Marble Medium
- Acrylic paint in gold
- Marbling tray
- Round brushes, bamboo sticks, fan brushes
- Paper straw
- Water
- Liquid dish soap
- Cardstock or mixed media paper
- For making the Christmas cards you will need:
- Card set (card + envelope) or brown kraft paper
- Marbled paper or similar
- Ribbons, e.g. in red and green
- Round paper punch in different sizes
- Glue-stick
- Scissors
- Bamboo paper folder
- Cutting mat
- Pencil, markers, ruler
CREATE A MINIMALIST HAND-MARBLED PAPER
In the videos below I show you how you can marble paper. Furthermore, you can find a step-by-step manual including video tutorials and quality materials in my DIY Paper Marbling Kit.
- Prepare Deka Marble Medium according to label instructions, mix the Deka Marble paints with a brush.
- Cut the paper so it fits into your marbling tray. If you wish, you can add a couple of golden brushes using a fan brush and acrylic paint. Let it dry before marbling it.
- Apply Deka Marble paint to the marbling bath/water using a round brush or bamboo stick.
- If you want to have some “white or transparent” spots on the paper, you can add a few drops of dispersant.***
- Use a paper straw to carefully blow over your marbling design making sure that the paints mix with each other.
- Place the paper onto the marbling bath and print your design.
- Remove the paper, rinse it and let it dry overnight.
*** Make your own dispersant at home: you will need 5 parts of water and 1 part of liquid dish soap.
MARBLED CHRISTMAS CARDS STEP-BY-STEP
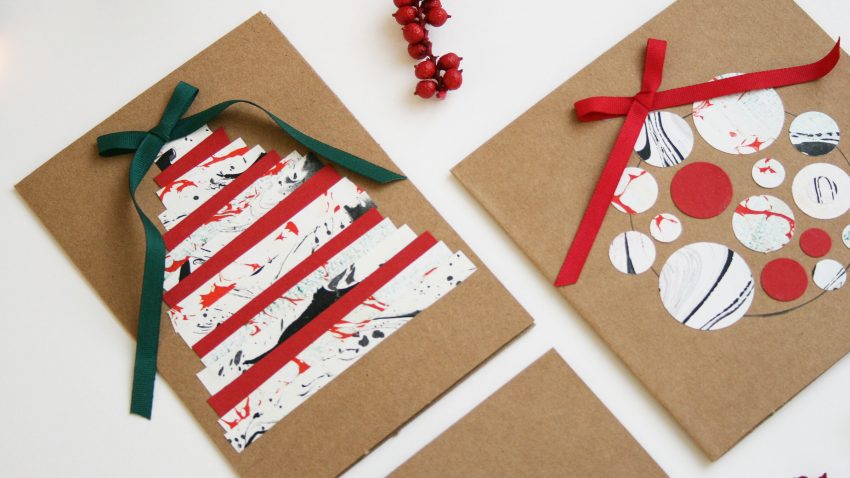
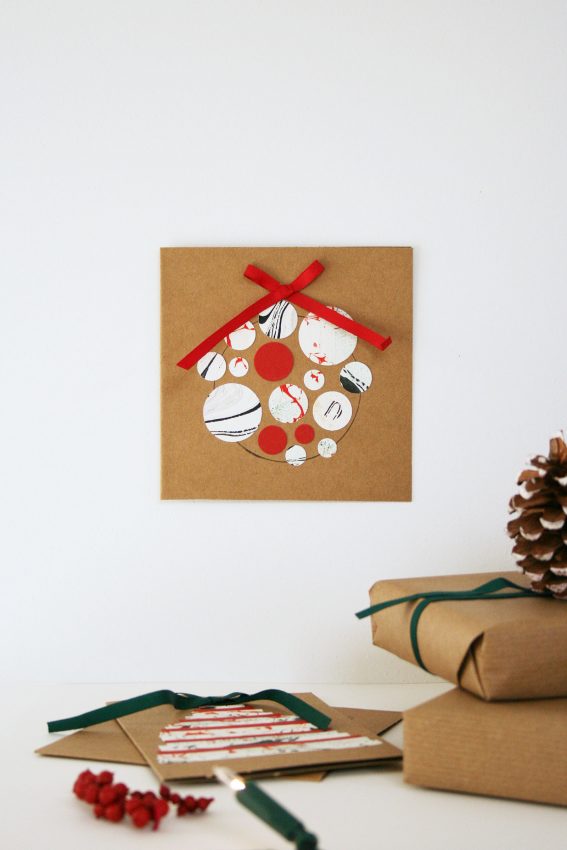
Now you can use your beautiful hand-marbled paper for making your Christmas cards! I’ve created two variations of Christmas cards for inspiration, let me show you step-by-step how it’s done.
Extra tip: What about an eco-friendly Christmas tree or a piece of wall art for your home? Instead of making cards, you can paste these designs on a DINA4 or DINA5 sheet of paper and make a Christmas tree for your walls. I’m’ sure any cat lady out there will like this idea! 😉
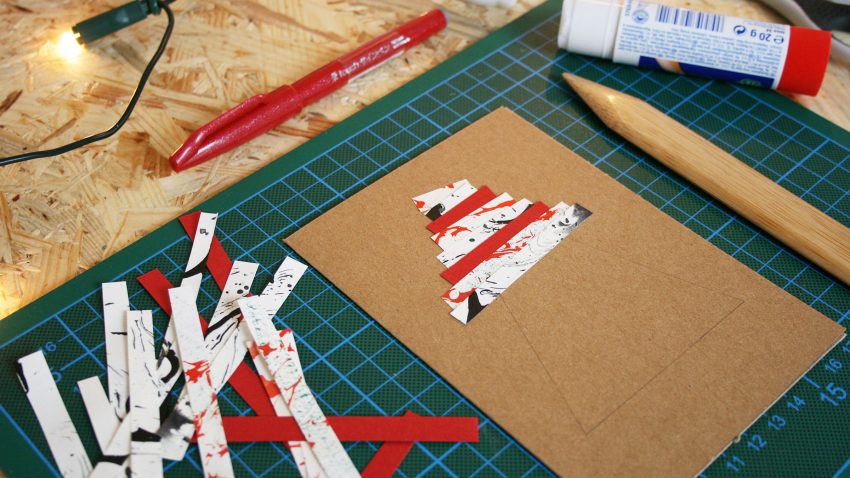
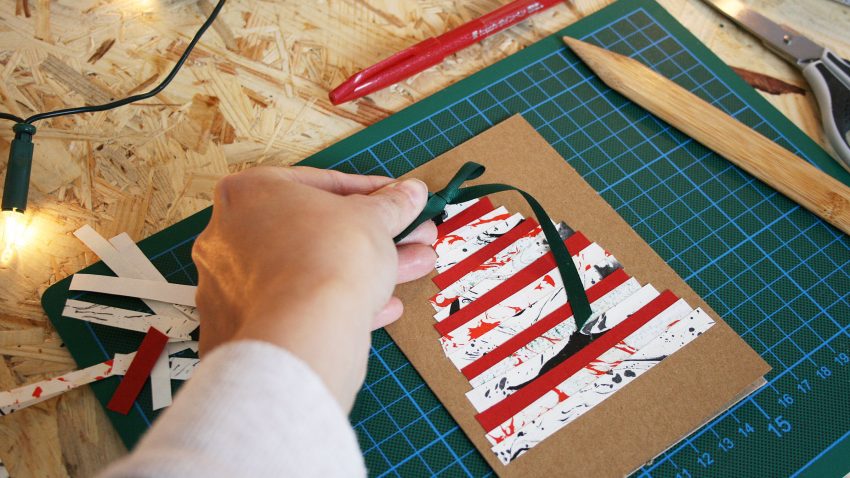
VARIATION #1: Striped Christmas tree
- Cut several strips out of your hand-marbled paper. Eventually, you can also cut strips out of coloured paper or cardstock, e.g. in red or green. This way you can create a beautiful combination of patterns and colours.
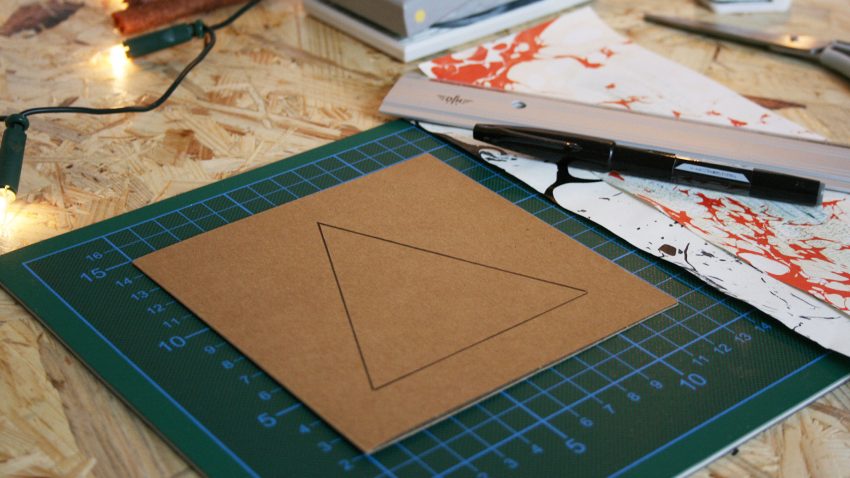
- Draw the shape of a Christmas tree on the card using a pencil.
- Cut the paper strips so they match the shape of the Christmas tree and paste them. Make sure to alternate designs and colours. Use a bamboo paper folder to press over the paper and make sure it’s fixed.
- If you like, you can add a bow on top of the Christmas tree.
- Almost ready: now write down your best wishes and send the Christmas cards to family and friends.
VARIATION #2: Abstract Christmas tree / Christmas bubble
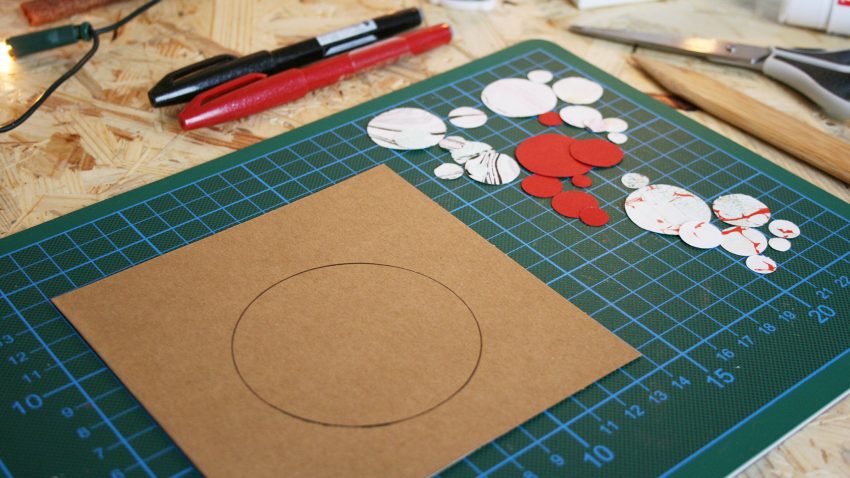
- Punch several circles out of your hand-marbled paper and cardstock or coloured paper in red and green. If you don’t have a paper punch, you can cut the circles yourself. Use coins or the top end of jam jars to draw the shapes and cut them with scissors.
- Draw the shape of a Christmas tree on the card. Alternatively, you can draw a Christmas bubble too.
- Before you paste the circles onto the card, play around with the composition until you are happy with the final layout.
- Paste the circles on the card using a glue-stick and a bamboo folder to make sure the paper is fixed.
- If you like, you can add a bow on top of your Christmas tree or bubble.

ONE TECHNIQUE, ENDLESS POSSIBILITIES
You can use the designs shown above for other projects, e.g. to decorate your gift paper. Creativity has no limits, so grab your materials, get your workspace ready and start creating!
I would love to see your DIY Christmas projects! Tag me on Instagram with the hashtags #indigocraftroom and #12giftswithlovegoesxmas or send me pictures of your Marbled Christmas cards via e-mail to info(a)indigocraftroom.com.
Do you have any questions about this DIY tutorial? Send me a message via e-mail or Instagram.
I wish you a wonderful Christmas season and all the best for the new year!
PS: Do you want more inspiration for this Christmas season? Have a look at the blogs from the other makers of #12giftswithlovegoesxmas:
1 – Sabine, Insel der Stille
2 – Karen, Indigo Craftroom
3 – Fee, Fairy Likes
4 – Kathrin, Studio Karamelo
5 – Conny, Smillas Wohngefühl
6 – Kati, Malamü
7 – Rosy, Love Decorations
8 – Evi, Mrs. Greenhouse
9 – Mike, Herr Letter
10 – Jutta, Kreativfieber
11 – Vanessa, Madame Mops (nur IG, ohne Blog)
12 – Dorothea, Zauber ein Lächeln
13 – Katharina, 4 Freizeiten
14 – Kathy, Kathy loves
15 – Johanna, Johanna Rundel
16 – Dorothee, abc.doro.t (nur IG, ohne Blog)
17 – Betty, phelinaee (nur IG, ohne Blog)
18 – Janine, Schninskitchen
19 – Franzi, Aye Aye DIY
20 – Franzi, Das ist yeah
21 – Alex, alex.prettyorganized (nur IG, ohne Blog)
22 -Siggi, Werkstattartig
23 – Sabine, I’m sew happy
24 – Ioana, missredfox
Happy crafting,
Karen


