3 Common Mistakes When Marbling and How to Fix Them
29/08/2020
Interview with @im_sew_happy
12/11/2020Believe it or not, finding the “standard” names for traditional marbling patterns turned out to be more difficult than I first thought. Although marbling is in trend and nowadays you can find hundreds of DIY marbling tutorials on the Internet, when it comes to searching for the right documentation and original terms, you can end up in a loop of Google-Searches that would take you to an almost untrackable, unaccessible bibliography.
There is a lack of “official” information about the traditional art of marbling and apparently, there is no 100% consensus about the official terms or names for the different types of marbling patterns. Probably this has to do with the fact that marbling is a technique used for centuries in different countries. From Japan and China in the 10th Century to Turkey and Europe… each country or continent gave its own names to the techniques and the patterns.
According to this interesting article from the University of Washington: “When examining classification of marbling patterns, it is important to know that although many texts have been written on the subject, none is universally accepted as the ultimate authority. Historically patterns have been given idiosyncratic names, based on various criteria: the techniques used in their making, cultural practices or artist’s whim. The result is that patterns have multiple names.”
Now that we know that the same pattern might have another name depending on the country where it was made or the making process itself, let’s leave the theoretical part on the side and dive into 5 of my favourite marbling patterns and techniques.
Marbling Pattern #1: Stone or Turkish Spot
This is probably one of the most popular marbling patterns of all times. It’s well-known as Stone by the way the paint is thrown to the marbling bath and the “pebbles” alike shapes. It also goes by the names Turkish spot, Agate, Stein, Achat, Caillouté Simple. A Stone pattern is usually the first step before creating other more detailed patterns like a French Comb or a Git-Gel.

Marbling Stone Pattern in 3-colours: Deka Marble yellow, red and pink.
Marbling Pattern #2: Git-Gel
Once you have created a Stone pattern, you can use a stylus or any other sharper object to turn it into a Git-Gel pattern, which means “back and forth”. This is because you move your stylus back and forth all over the marbling bath. You might find this pattern also called Gel-Git… apparently this is the original Turkish name which has been mistaken with Git-Gel over time.
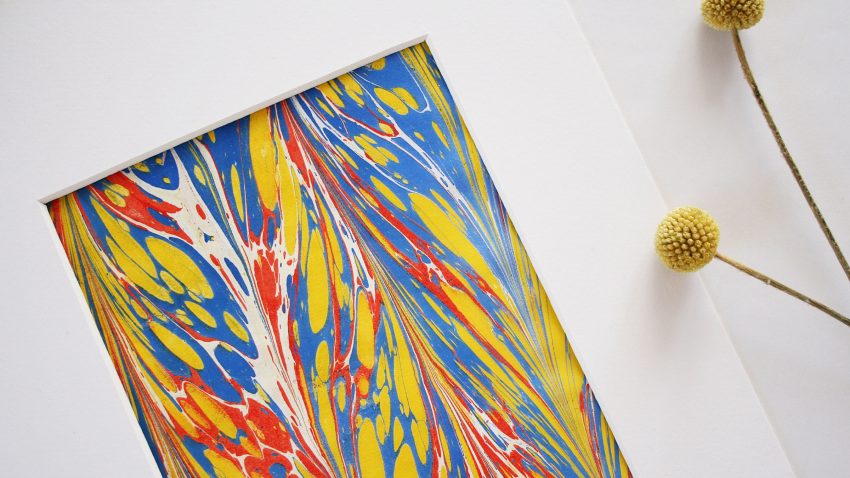
Details of a Marbling Git-Gel Pattern on soft, white paper using a combination of primary colours: Blue, red and yellow.
Marbling Pattern #3: Swirl, French Curl or Snail
As you see, giving just one name to a pattern can be challenging. In this case, the Swirl, French Curl or Snail pattern starts as a basic Stone pattern, which quickly will be transformed by using a stylus or sharp object and drawing swirl shapes into the marbling bath. Usually, it starts with a Stone pattern, but you can add some extra swirls to any other pattern.
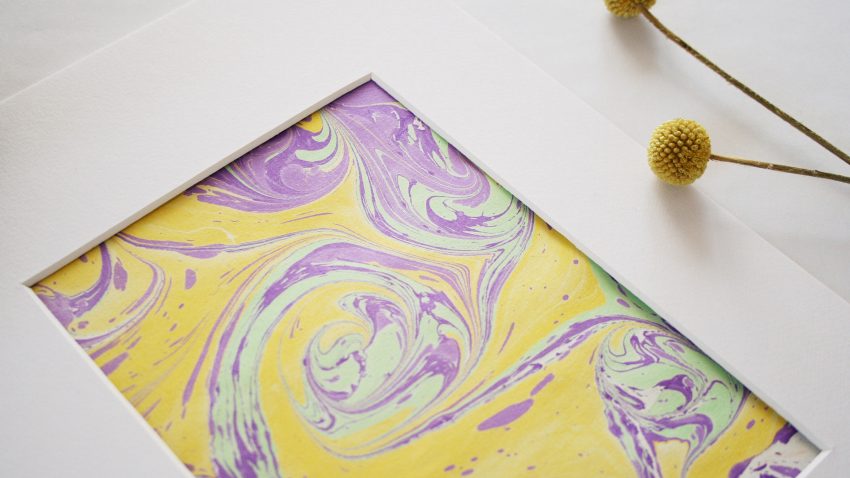
Detail of a Marbling Swirl Pattern in a 3-colour combination: Violet, yellow and light green.
Marbling Pattern #4: Suminagashi
Suminagashi (floating ink) is a marbling technique that originated in Japan. I am listing this technique or tradition as a pattern here because I love to make suminagashi alike shapes with my marbling paints. For traditional Suminagashi you would use ink instead of marbling paints. But even using marbling paints you can achieve beautiful imperfect shapes that recall the typical Suminagashi effect.
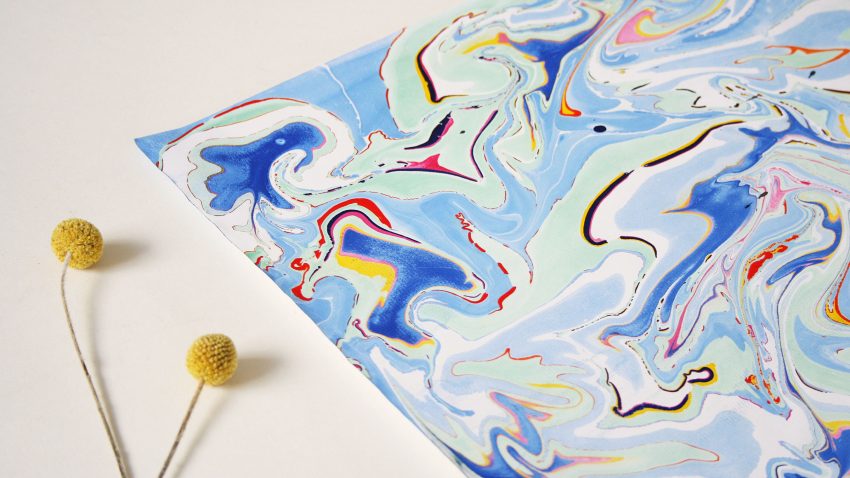
Marbling Suminagashi inspired: One of my favourite marbling patterns made using up to 5 different colours.
Marbling Pattern #5: Your Own Free-Style Design!
I admire the work and passion of traditional marbling masters, but I also believe we should all experiment with these techniques and be able to create our very own designs. Marbling is like a creative therapy for me. It’s my way of meditation. A moment I enjoy playing with colours and admiring how the paints mix with each other while floating on the marbling bath. And the most surprising thing of all this: You can’t ever be 100% sure about the result. Once the colours mix with each other and you play around with your tools, you have to wait until you get your printed sheet of paper to see the final pattern.
As summarized in the article from the University of Washington mentioned above: “Marblers often speak of the temperamental nature of this process as it is altered by temperature, humidity, the types of paper used, quality of inks, thickness of size, shaky hands and even dust particles.”
Learning how to make and master the traditional marbling patterns is as challenging as creating your very own designs. A pattern is not just a combination or repetition of similar shapes, but also the technique of the person behind the marbling tray, the choices you make as an artist: The colours you use, the size, the tools…
In my marbling courses and workshops, I tell you more about the traditional marbling patterns, how they are made, my favourite tips & tricks and troubleshooting tips, and of course how can you get more out of the basic techniques! Furthermore, if you want to try it at home you can order a DIY Paper Marbling Kit, which includes a detailed explanation and step-by-step video tutorials for these traditional and modern marbling patterns.
Want to learn more about marbling? Join now my Patreon community and enjoy exclusive insights in my work, marbling tips & tricks, webinars and more!
Keep creating and experimenting!
Your crafty fellow,
Karen


