The Indigo Bookbinding Challenge
11/08/2020
5 Traditional Marbling Patterns
08/10/2020Marbling can be really tricky. Even if you are marbling with ready-to-use marbling paints, you can easily get disappointed and lose motivation if your papers are not looking anything like the ad you saw on some Instagram account.
I’m not going to lie you, mastering the traditional art of marbling takes time, effort and a bunch of paint and paper. But even as a beginner, you can get astonishing marbling papers if you work accurately and look after avoiding these common mistakes we use to make when we start marbling paper.
Mistake #1: You are not using enough paint
If you want bright and strong patterns, you need to use enough paint. If you just give a few drops of paint to the marbling bath, you will end up with very soft patterns. Take into consideration these other factors:
- The bigger the marbling tray you are using, the more paint you will need to cover all the marbling bath. This seems logical, right?
- The more elaborated the pattern is, the more paint you will need. If you are creating a pattern with lots of details, lines or swirls, you might want to add extra paint to the marbling bath. When creating patterns on the water with a bamboo stick or a stylus, some of the paint might end at the bottom of the marbling tray.
The best way to apply a bunch of paint at the same time and cover the marbling bath surface within seconds is by using a Fan Brush, which is also very suitable when marbling Stone or Turkish Spot patterns.
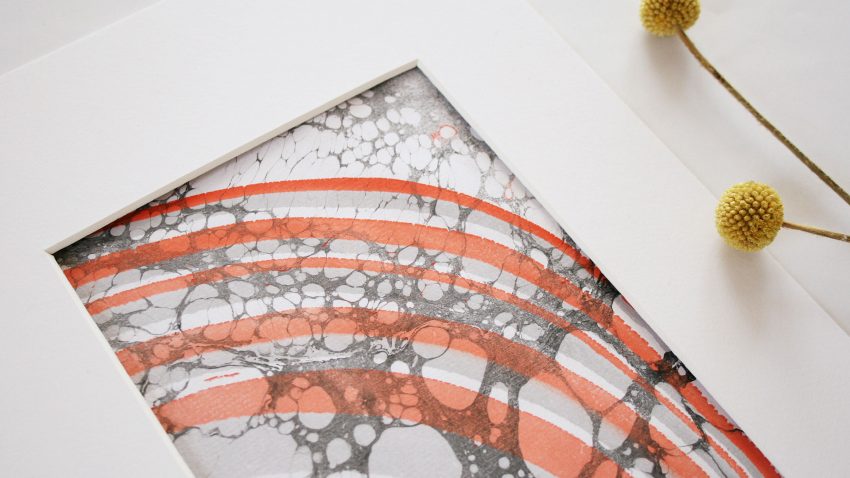
Getting intense, solid patterns can be tricky if you don’t use enough paint. Here I failed by not using enough of DEKA Marble Paint in Black and Red.
Mistake #2: You are not using a mordant
Depending on the technique and the brand of marbling paints you are using, you might need to mordant the paper beforehand. For creating a simple mordant solution you will need some boiled water and alum. When working with DEKA Marble Paints you can choose to mordant the paper or not. I recommend it when you are marbling big sheets of paper, like A3 size and bigger.
But always do a test first: This way you can figure out which papers can be marbled without treating them first with alum and which ones can’t.
PS: I am referring here to paper, but if you are marbling on fabric, you definitely would need to mordant the surface beforehand. Otherwise, the colours will wash-off after rinsing the fabric or later when you wash it.
Use a solution of water and alum to mordant your papers before marbling them.
Mistake #3: Your size or marbling bath isn’t prepared correctly
The size is a combination of water and a thickening agent which allows the paints to float on the surface of the marbling bath. In traditional marbling, the most common product used for making size is carrageenan, a kind of seaweed also known as Irish Moss. Finding the right carrageenan for marbling and preparing it is one of the most tricky steps when marbling. Therefore I am happy that I can work with DEKA Marble Medium, which is also vegan-friendly and contrary to carrageenan, which can take up to 12 hours before it’s ready to use, DEKA Marble Medium just needs about 30 minutes before you can start using it for your marbling bath!
Still, even using DEKA Marble Medium, you can fail while preparing the size and end up with marbling papers poor in quality. It’s very important to use the exact right amount of medium and water, dissolve the medium with the help of a wire whisk and let it sit for no longer than 30 – 45 minutes.
I have failed several times trying to making the right size, too. Sometimes the size was too watery, then the paints wouldn’t float, or the size was too thick and then the paints wouldn’t expand correctly. But with the time, my technique has become more accurate and I have learned to take my time for these kinds of preparations, so I don’t waste my time in the end because I am not able to use the size for marbling.

This paper was marbled by a participant in a test workshop. That day I failed in preparing the size… it was too thick and the paint wouldn’t stick properly.
EXTRA TIP:
Ok, there are probably more mistakes we make when marbling paper. I know this for sure because I have been marbling for almost 3 years and I have made a lot of mistakes and learned from them. So here is an extra tip, which might seem obvious but we tend to overlook: Mix the paint accordingly before using it! Most of the paint tends to remain in the bottom of the glass jars and if we don’t mix it right we might end up with very soft colours. I cannot repeat this enough. You can use a small round brush to mix the paint. After that, you might want to let the paint sit for a couple of hours until all air bubbles disappear.
As you see, many different factors come into play when getting perfect marbled papers. There are some common mistakes that are easier to prevent. Others we might overlook, or we might not even be conscious of them. I do believe that when you are not in a peaceful, mindful and creative mood, you won’t be able to create astonishing art. No matter if your materials and tools are the best. Marbling is a unique traditional craft that for me has to do much more with our inner crafter, with our feelings and mood at that moment. So remember: get the right marbling supplies, take your time for preparations and enjoy the colourful process of marbling!
Don’t want to miss any of my blog updates? Sign up now for the Indigo Newsletter!
Your crafty fellow,
Karen


